
Contracts and payment links
How to generate a contract, take it through signature and payment, release the client's access and create payment links.
The Contracts screen, in the Sales group of the menu, is where you generate your clients’ contracts and follow each one until the client gets access.
How it works
Section titled “How it works”Every sale has a contract and a payment. The order can change:
- Main flow: the contract is signed first and paid afterwards.
- Pay first: for a sale that was already paid, you generate the contract without sending it and send it for signature later.
When the client pays through a payment link, they get access right away at the email they used to pay: an invite to create their Doxa account arrives there. The same invite shows up for you on the Contracts screen, with the Sign-up link. If the email doesn’t arrive, copy the link and send it to the client. This works whenever the payment has already been made.
Generate a contract
Section titled “Generate a contract”-
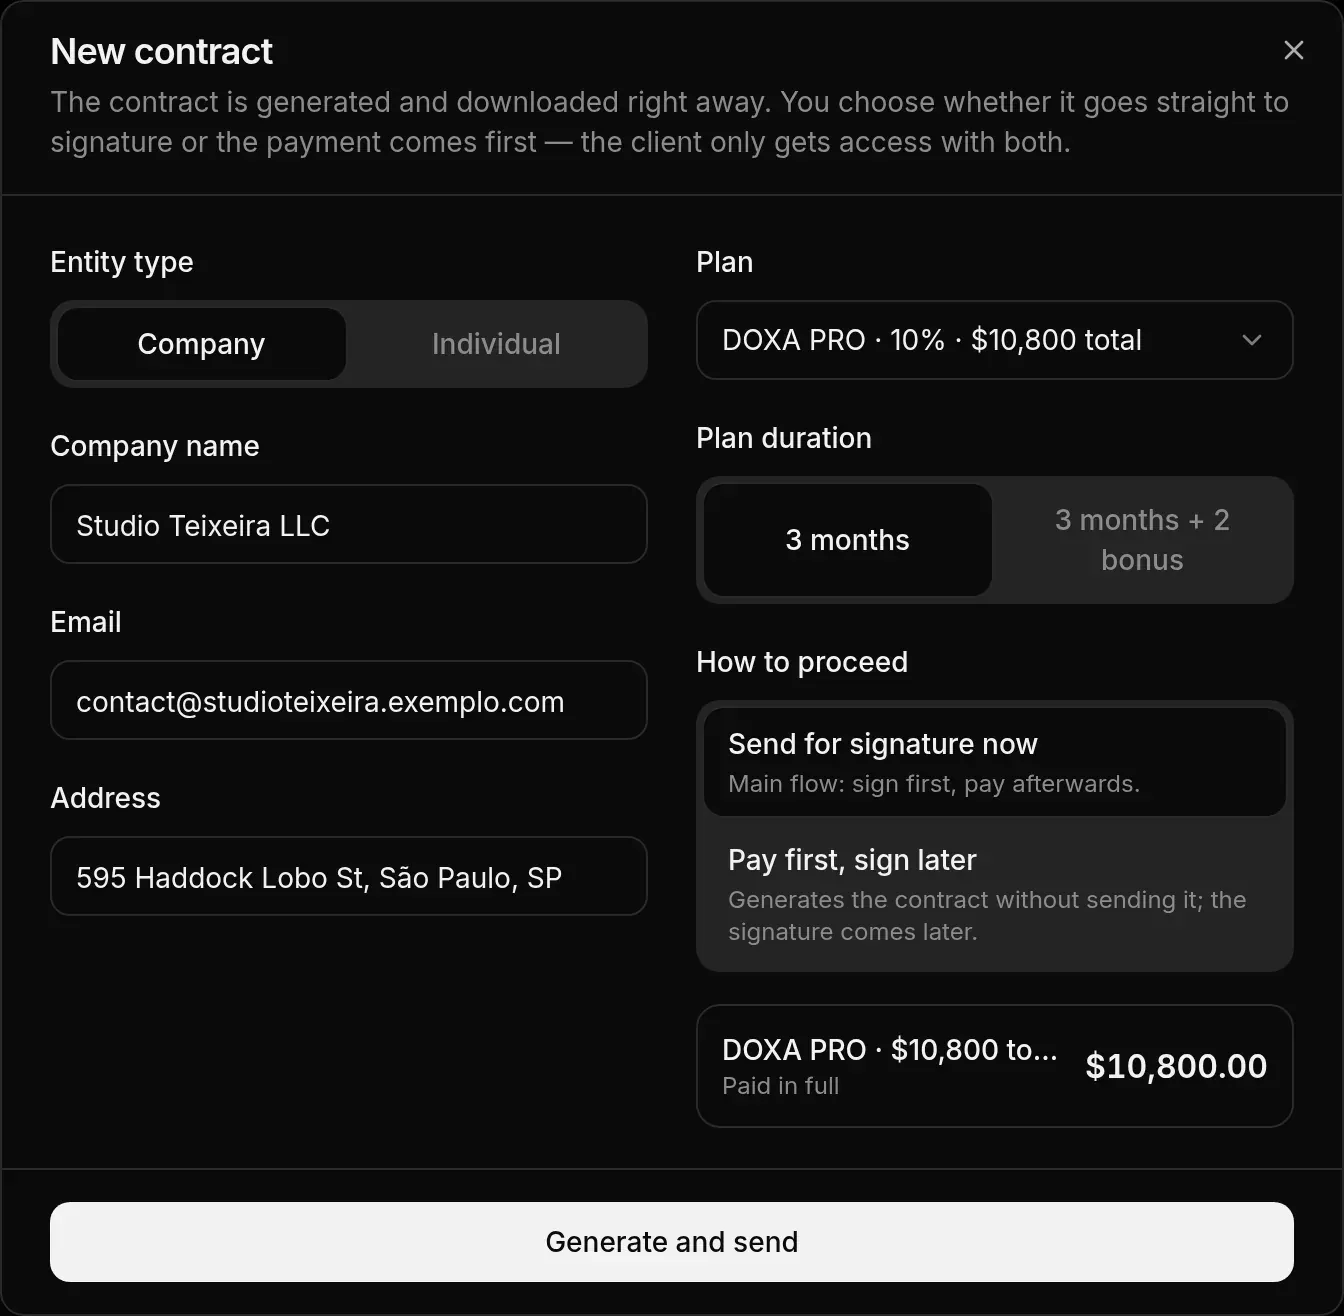
On the Contracts screen, click New contract. The same button is on the Tools card of the Home screen.
-
Under Entity type, choose Individual or Company.
-
Fill in the client’s name (Full name or Company name), Email and address.
-
Under Plan, choose a plan from the Catalog or one of the links you created under My links.
-
Under Plan duration, choose 3 months or 3 months + 2 bonus.
-
Under How to proceed, choose Send for signature now or Pay first, sign later.
-
Click Generate and send or Generate contract. The contract is generated and downloaded right away.
If you chose to send it for signature, the dashboard asks whether to send it now. Click Send for signature now, or Edit before sending if you want to review the clauses first. Until it is sent, the contract stays as a Draft.
Contract signed by the agency on the platform
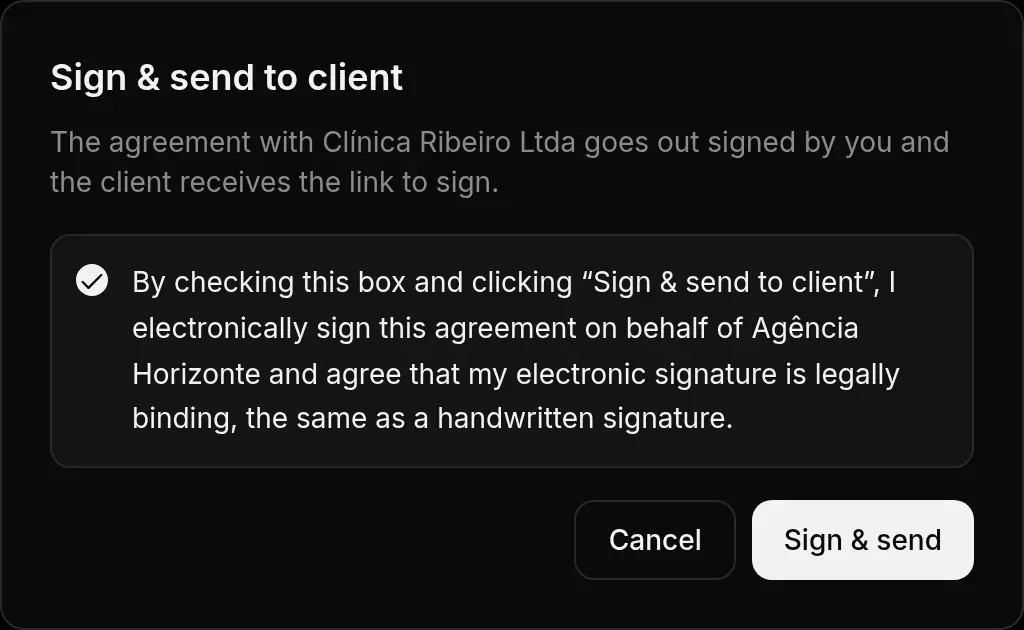
Section titled “Contract signed by the agency on the platform”If CS turned this option on for your agency, you sign the contract right in the dashboard, and only the client signs through the e-signature link. In that case, the send button is called Sign & send to client.
-
When sending the contract, read the consent text shown on screen.
-
Check the box. It confirms that you sign the agreement on behalf of the agency and that your electronic signature is legally binding, the same as a handwritten one.
-
Click Sign & send. The contract goes out signed by the agency and the client receives the link to sign.
In the contract’s progress, the step shows as Signed by the agency on the platform, with the name of the person who signed.
Without this option, the agency also signs through the link: open the contract and click Sign now. The client only gets their link after the agency signs.
Edit the clauses
Section titled “Edit the clauses”While the contract is a draft, you can edit its text. Click the pencil on the contract’s row, or Edit contract in the details, to open the Contract editor.
- Edit the sections that are open for changes and use Add clause to include a new clause.
- Locked clauses are the foundation of the contract and don’t change.
- Clause numbering is automatic. Don’t type the number yourself.
- Use Preview to see the PDF and Save to keep your changes.
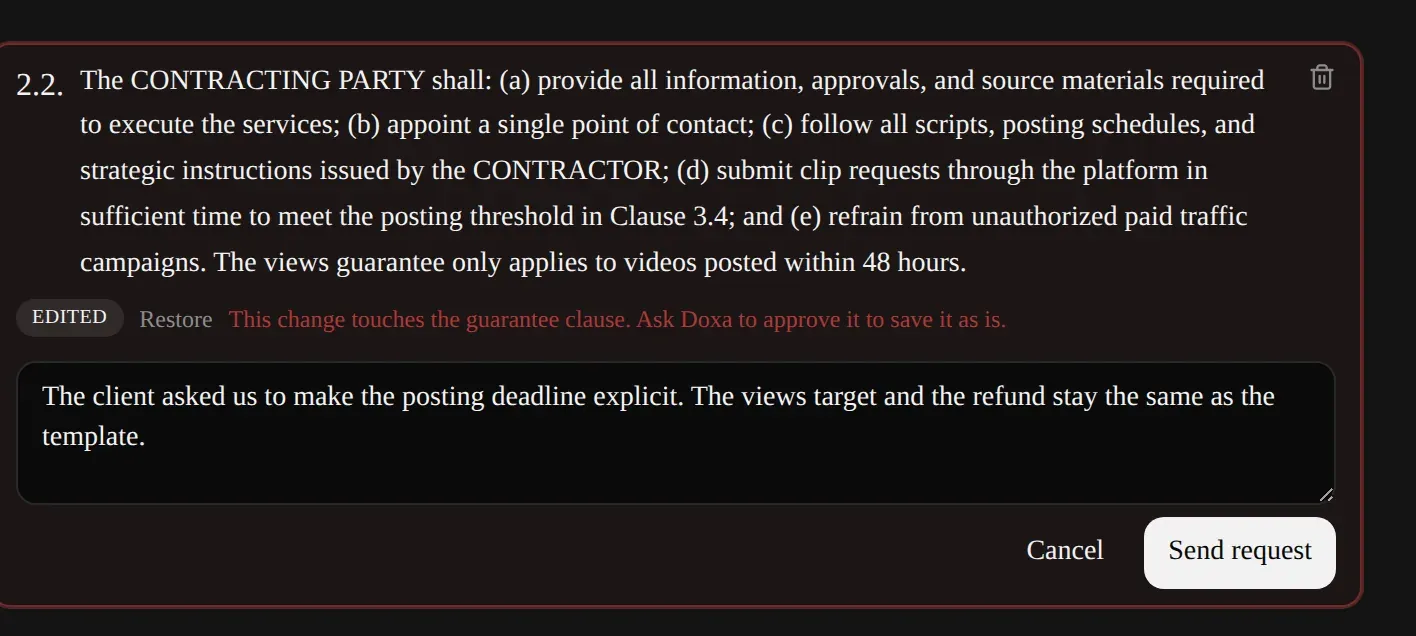
A change that touches the guarantee clause can only be saved with Doxa’s approval. Click Request approval, explain why the change does not compromise the guarantee and click Send request. The section shows Awaiting Doxa approval until there is an answer.
Once the contract is no longer a draft, editing is turned off.
Track your contracts
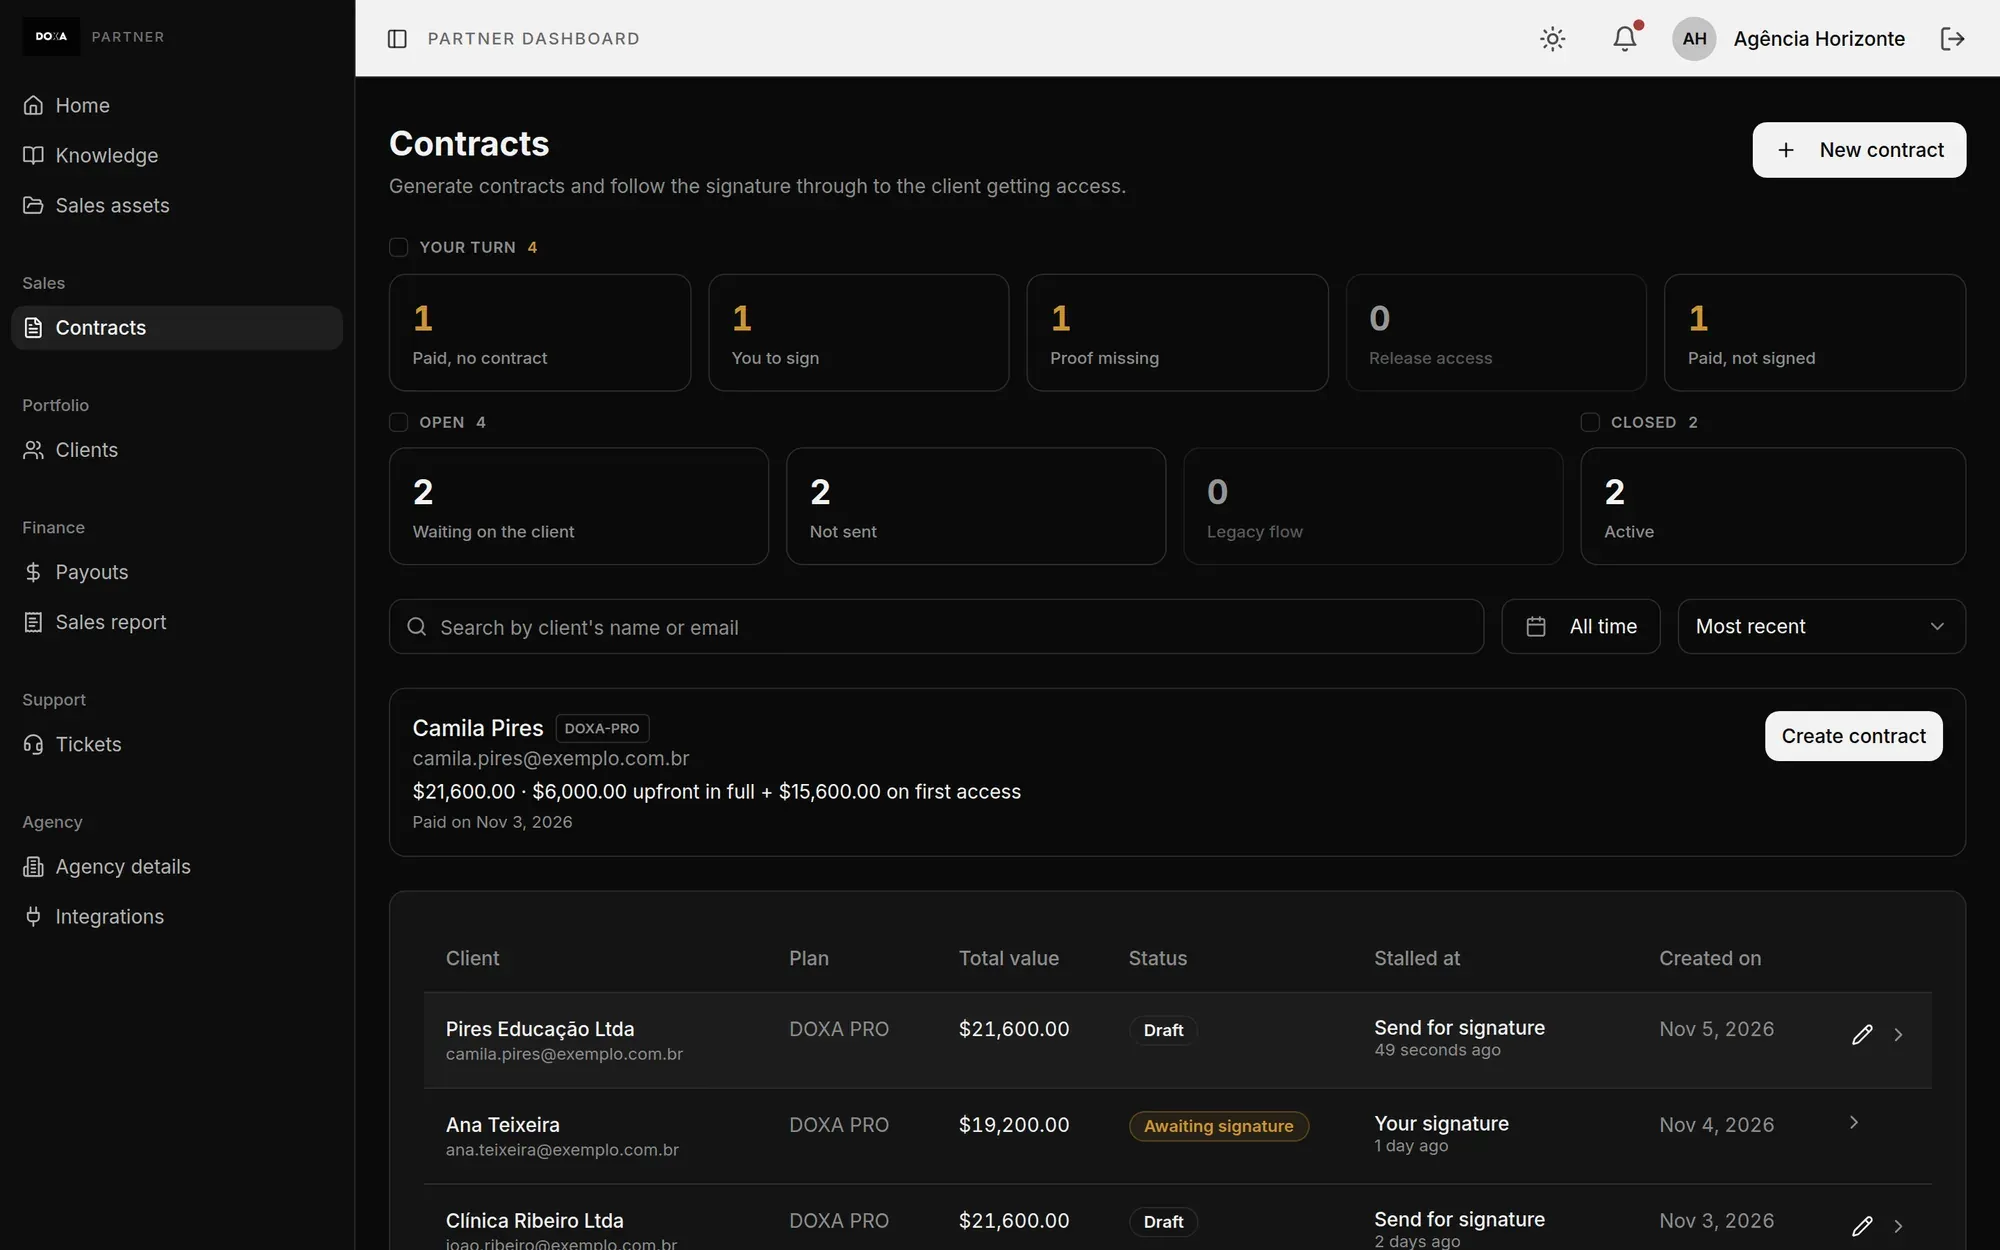
Section titled “Track your contracts”The list shows Client, Plan, Total value, Status, Stalled at and Created on. The Stalled at column tells you what the contract needs to move forward.
The filters at the top sort contracts by what you need to do:
- Your turn: Paid, no contract, You to sign, Proof missing, Release access and Paid, not signed.
- Open: Waiting on the client, Not sent and Legacy flow.
- Closed: Active.
You can select more than one filter, search by the client’s name or email, pick a date range and sort by Most recent or Stalled the longest.
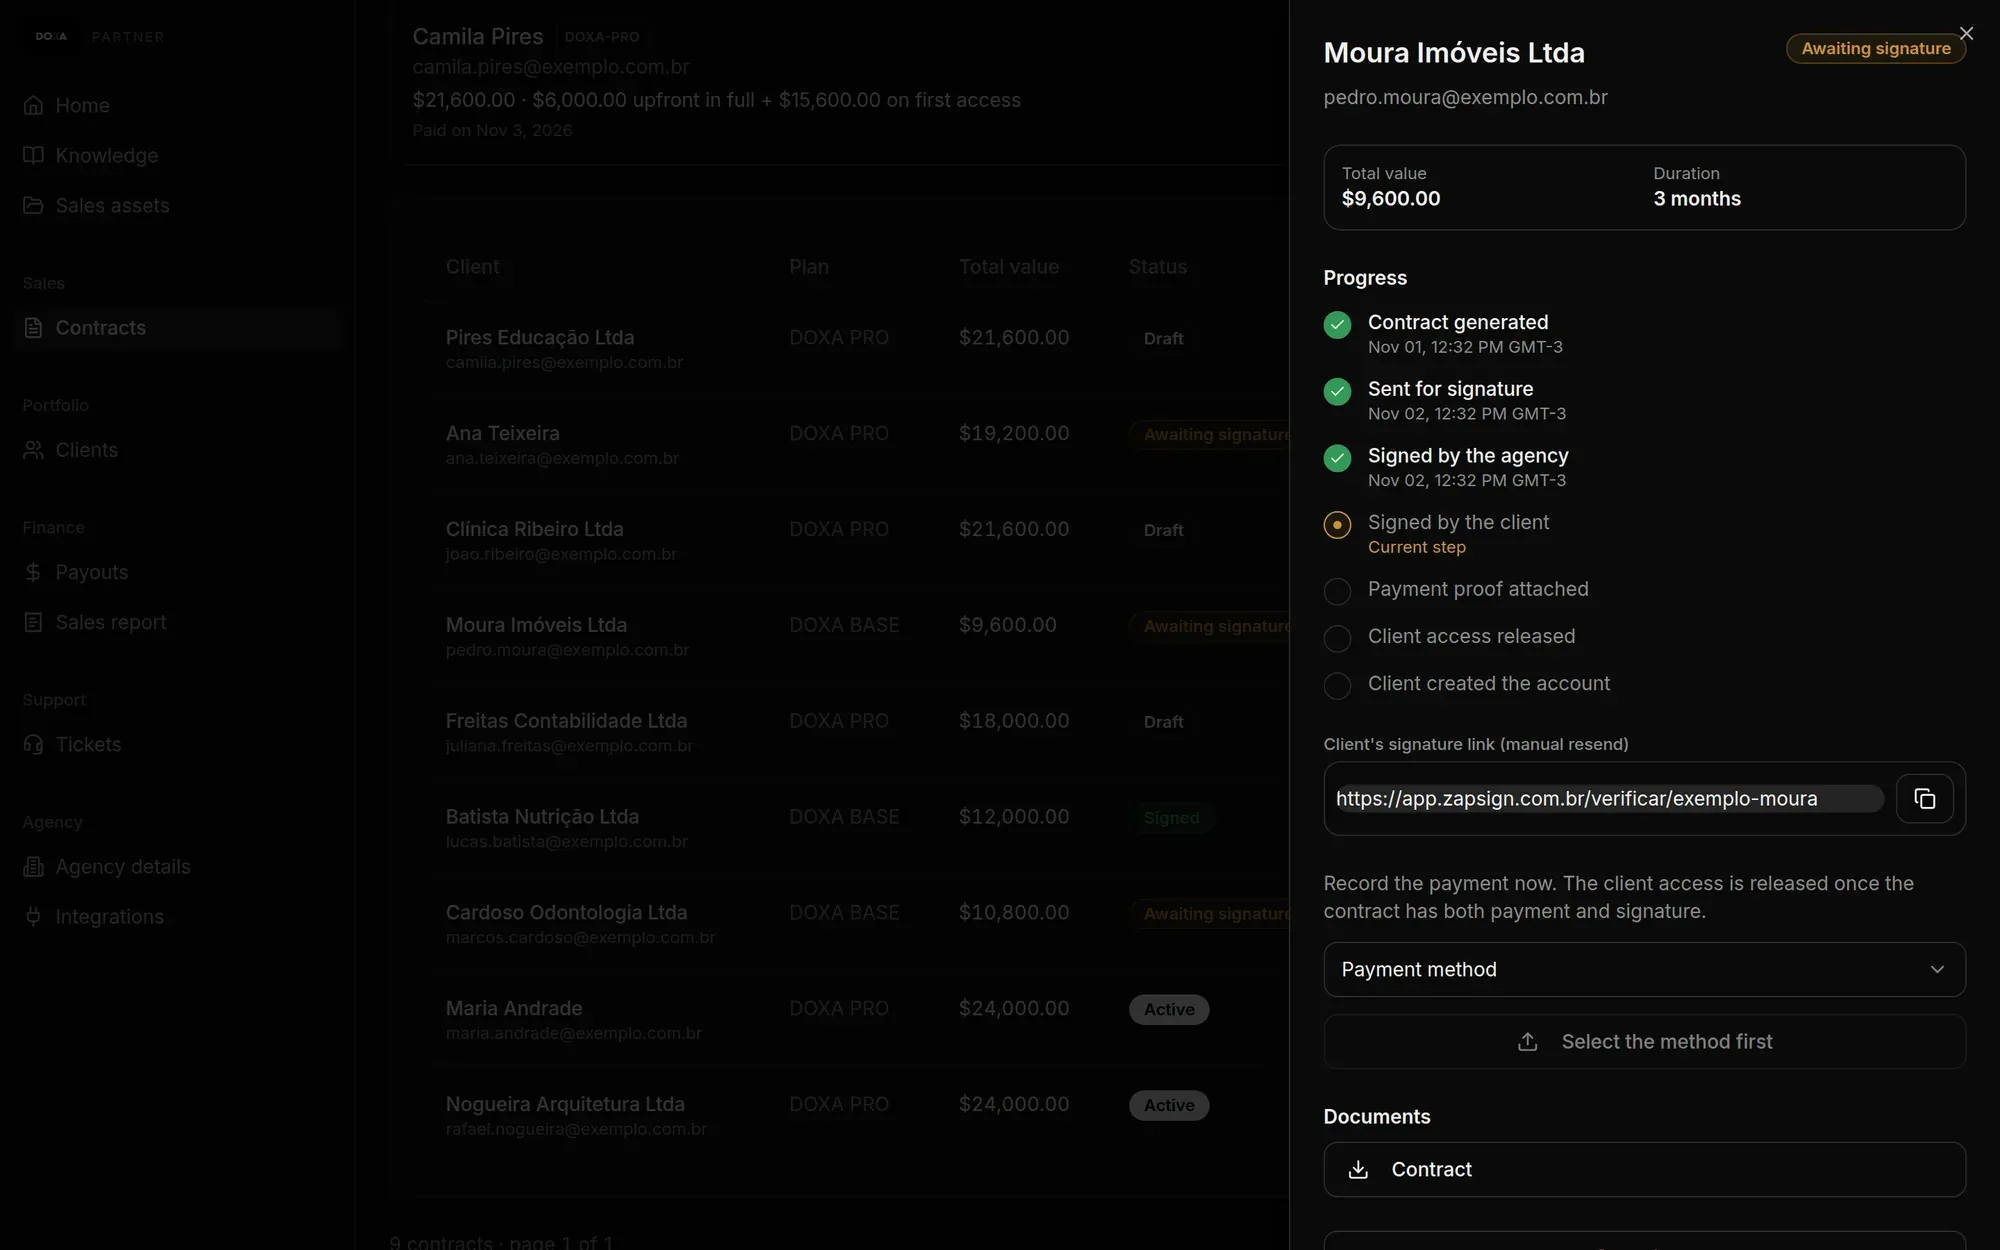
Click a contract to open its details. There you find the Progress, the Current step, the Documents to download and the actions available at that moment.
Paid sale with no contract
Section titled “Paid sale with no contract”When a client pays through a payment link and has no contract yet, they show up in a queue at the top of the screen, under the Paid, no contract filter. Each card shows the plan, the amount and the link’s terms, the payment date and whether the client has already created the account.
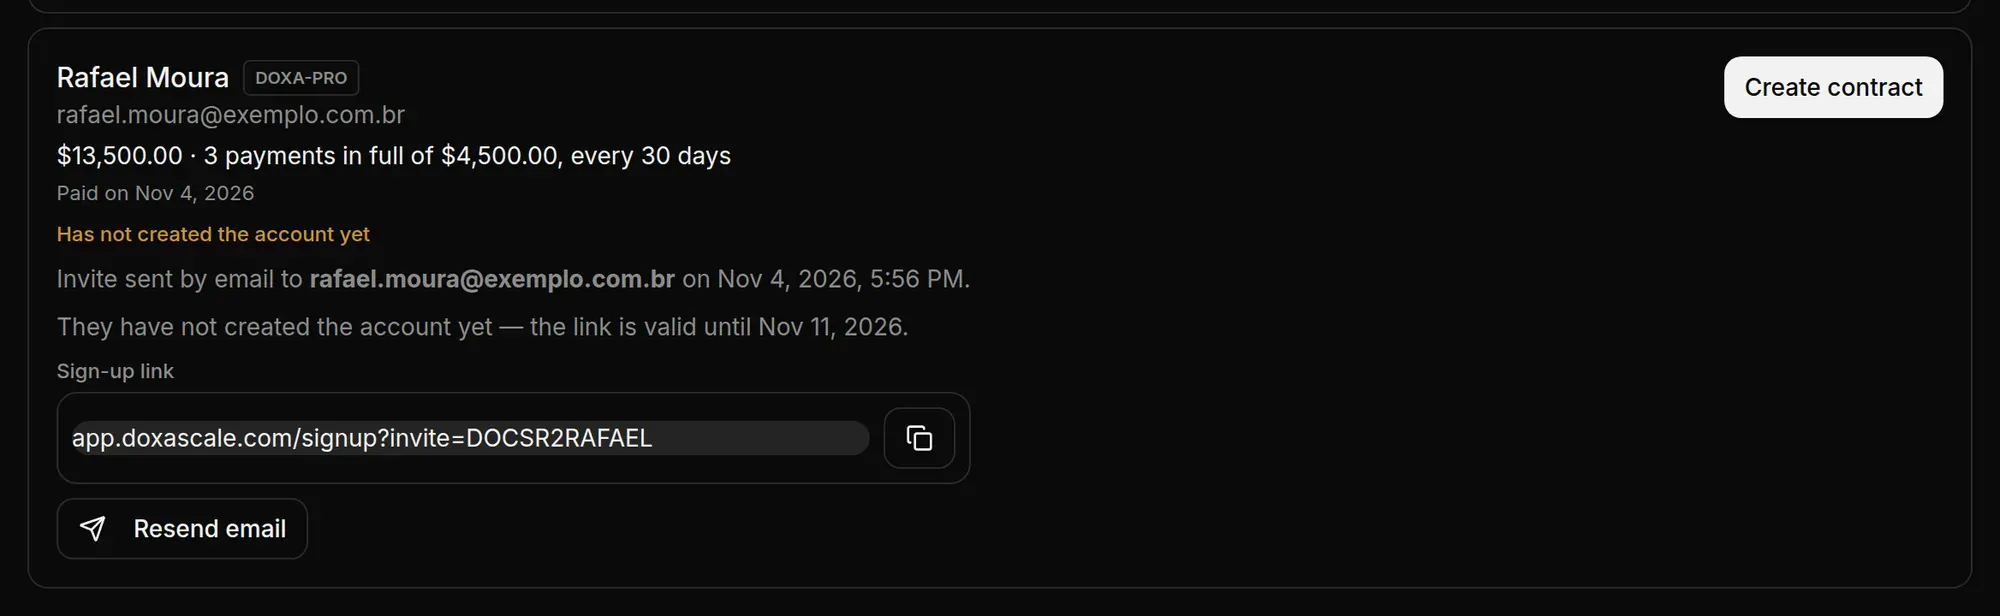
- Click Create contract to create the contract with the sale’s details already filled in.
- While it says Has not created the account yet, the card shows which email the invite went to and until when the link is valid. Copy the Sign-up link and send it straight to the client, or click Resend email.
- The invite always goes to the email used to pay. If the client paid with one email and wants to sign in with another, have them create the account through the sign-up link, which already carries the right invite.
Resend the signature link
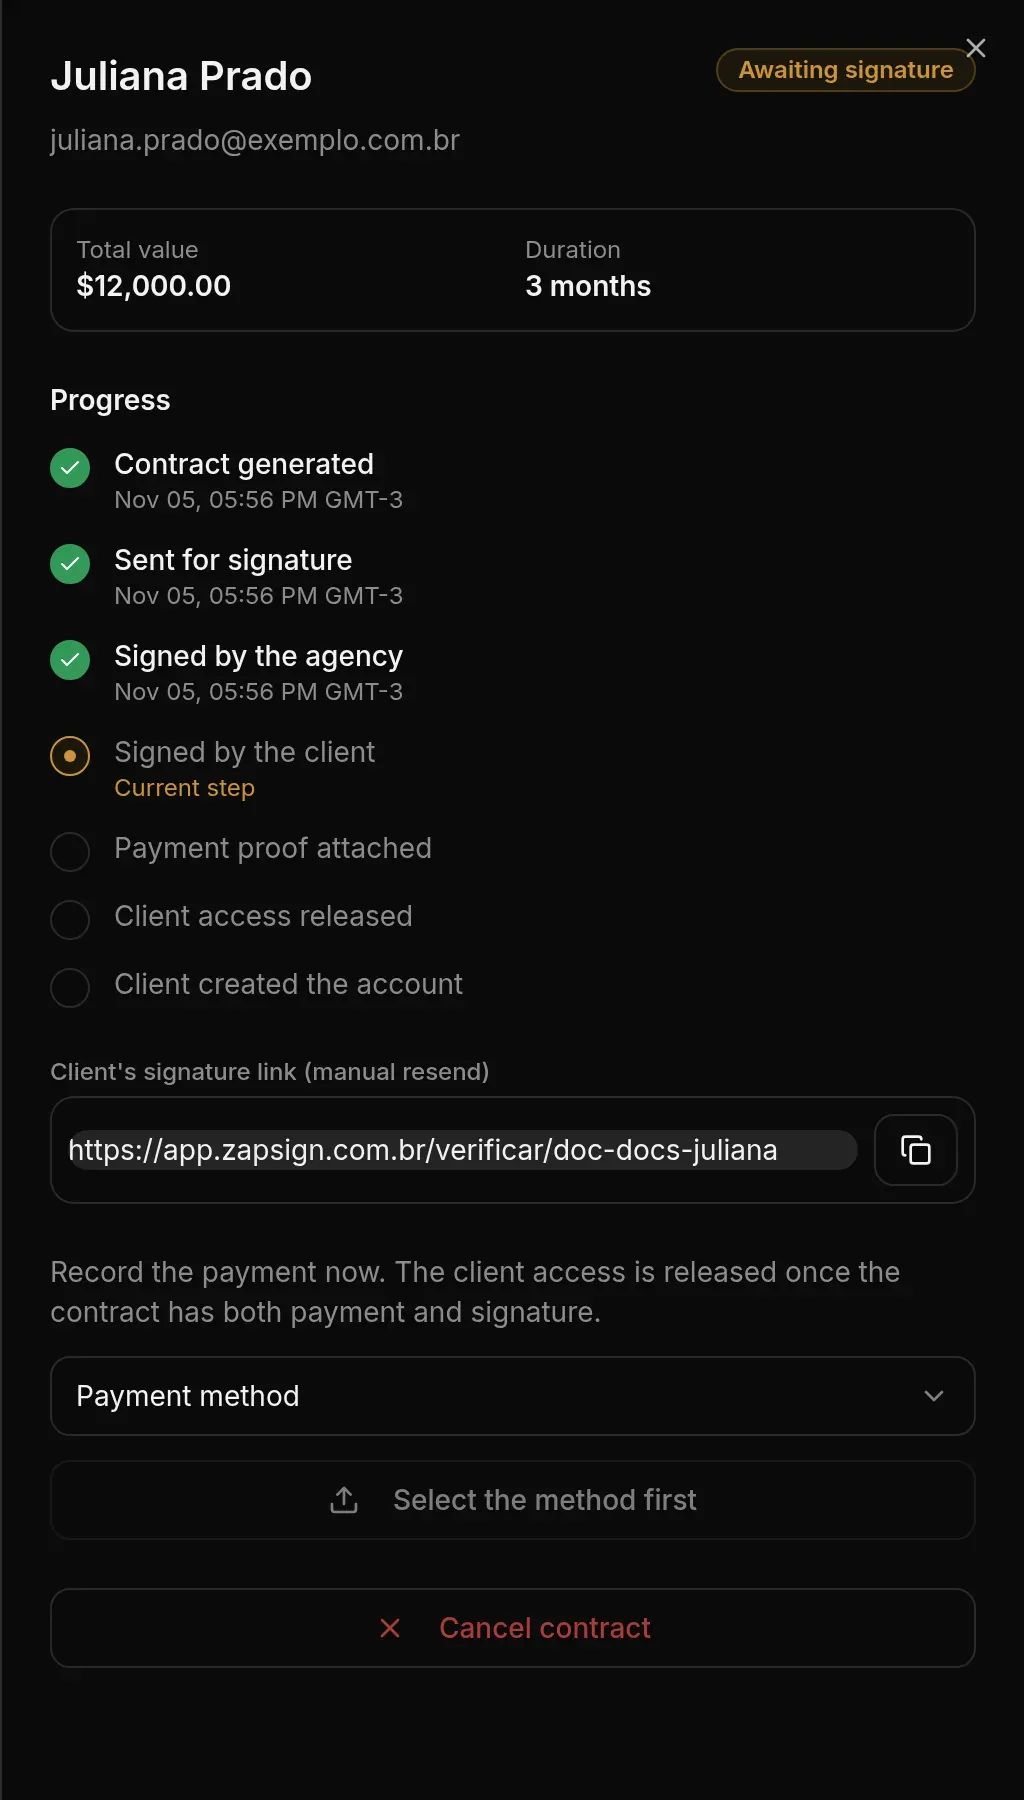
Section titled “Resend the signature link”If the client did not get the email to sign, open the contract and copy the Client’s signature link (manual resend). Send that link straight to them, by text message or email. The field shows up once the contract has been sent and is waiting for the client’s signature.
Follow the client’s invite
Section titled “Follow the client’s invite”Once access is released, the details show which email the invite went to and when. If the client has not created the account yet, you can copy the Sign-up link and send it to them, or click Resend email.
Cancel a contract
Section titled “Cancel a contract”In the details, click Cancel contract and confirm. The signature links stop working. Cancelling cannot be undone: to pick the sale back up, generate a new contract.
Payment links
Section titled “Payment links”On the Tools card of the Home screen, click Payment link. The Payment Links window opens over the screen and has two tabs: Plans and My links.
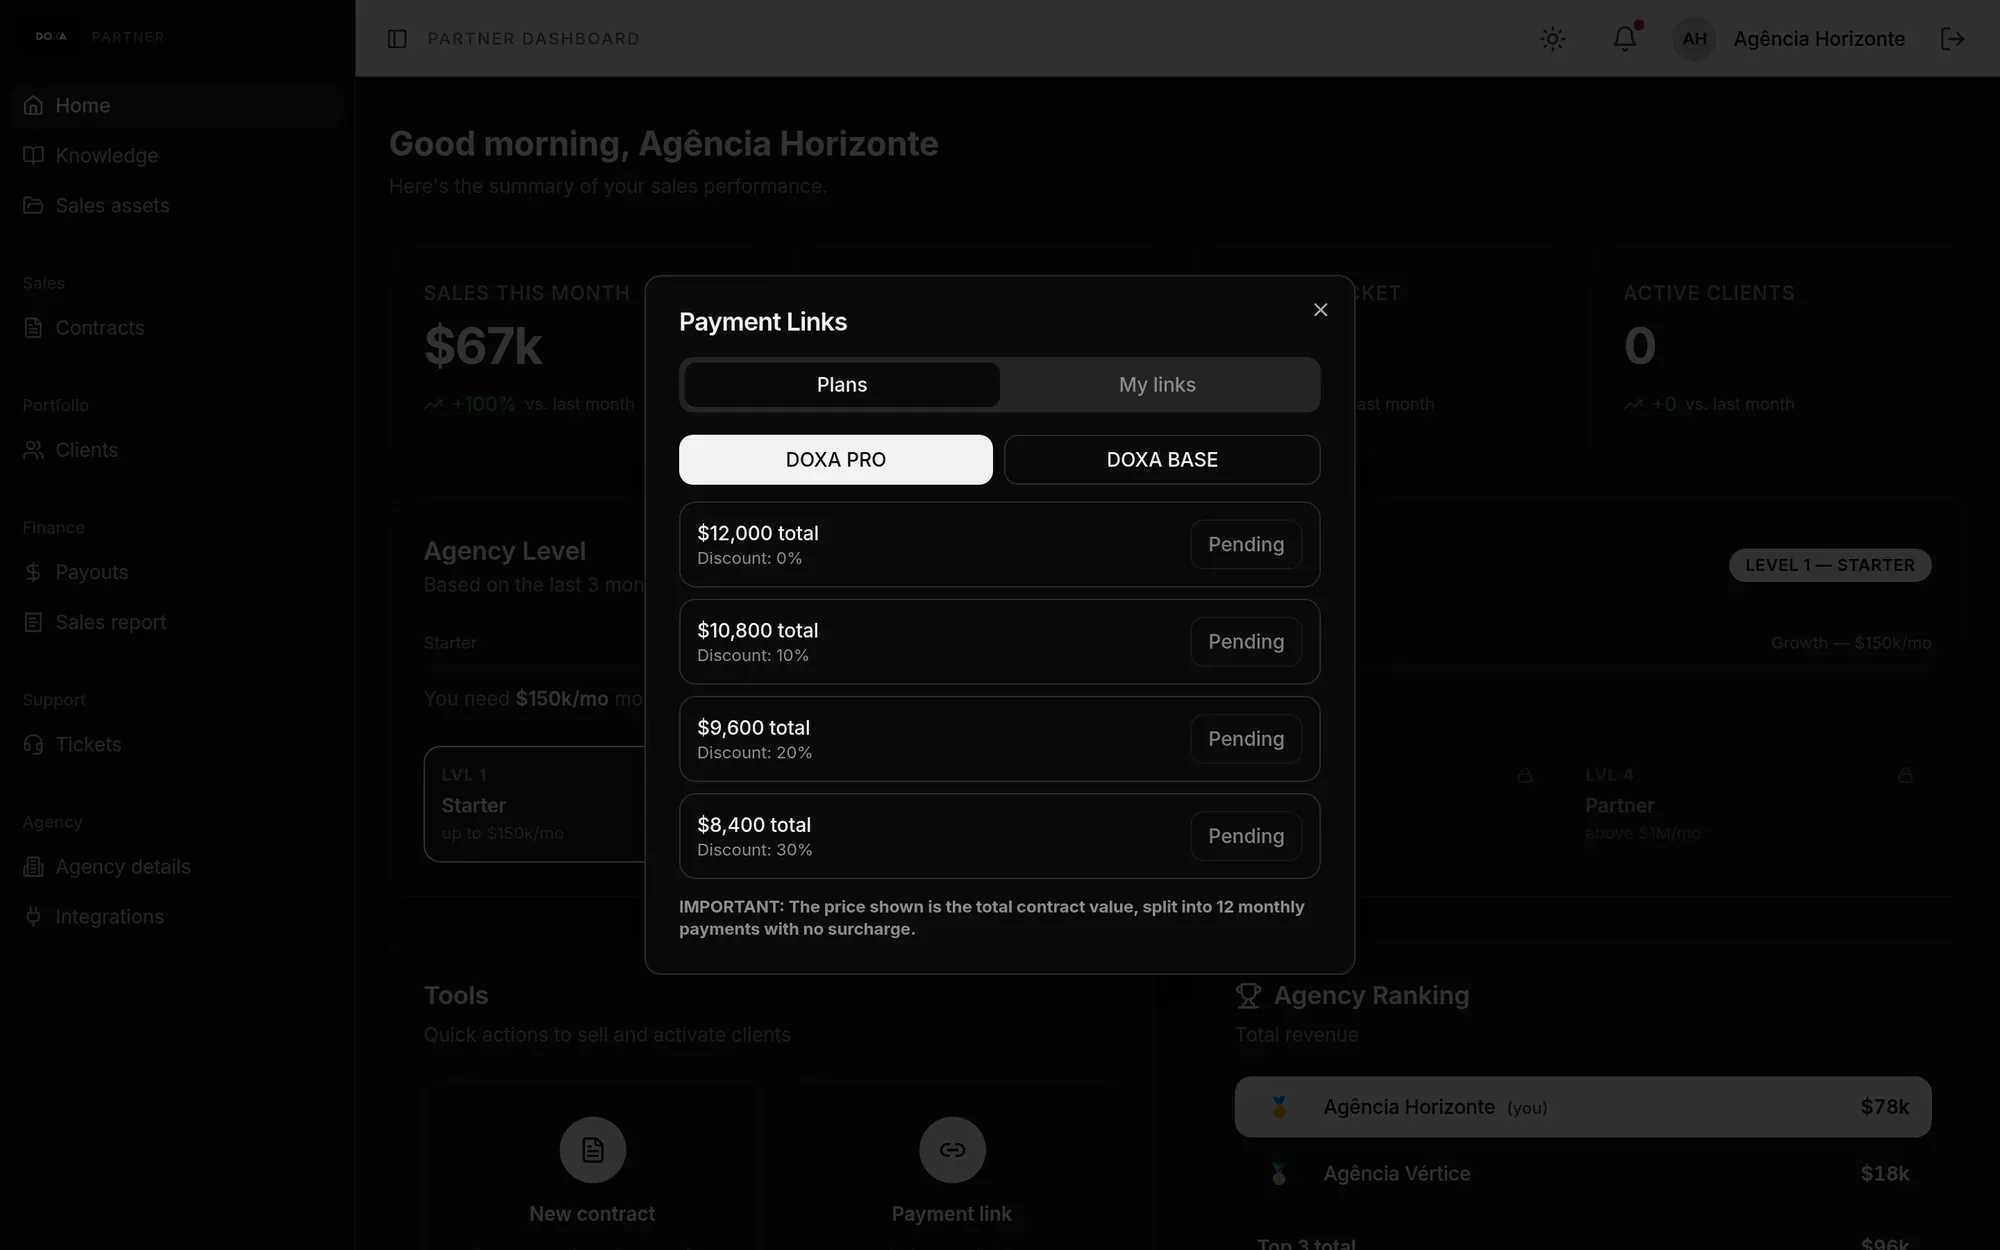
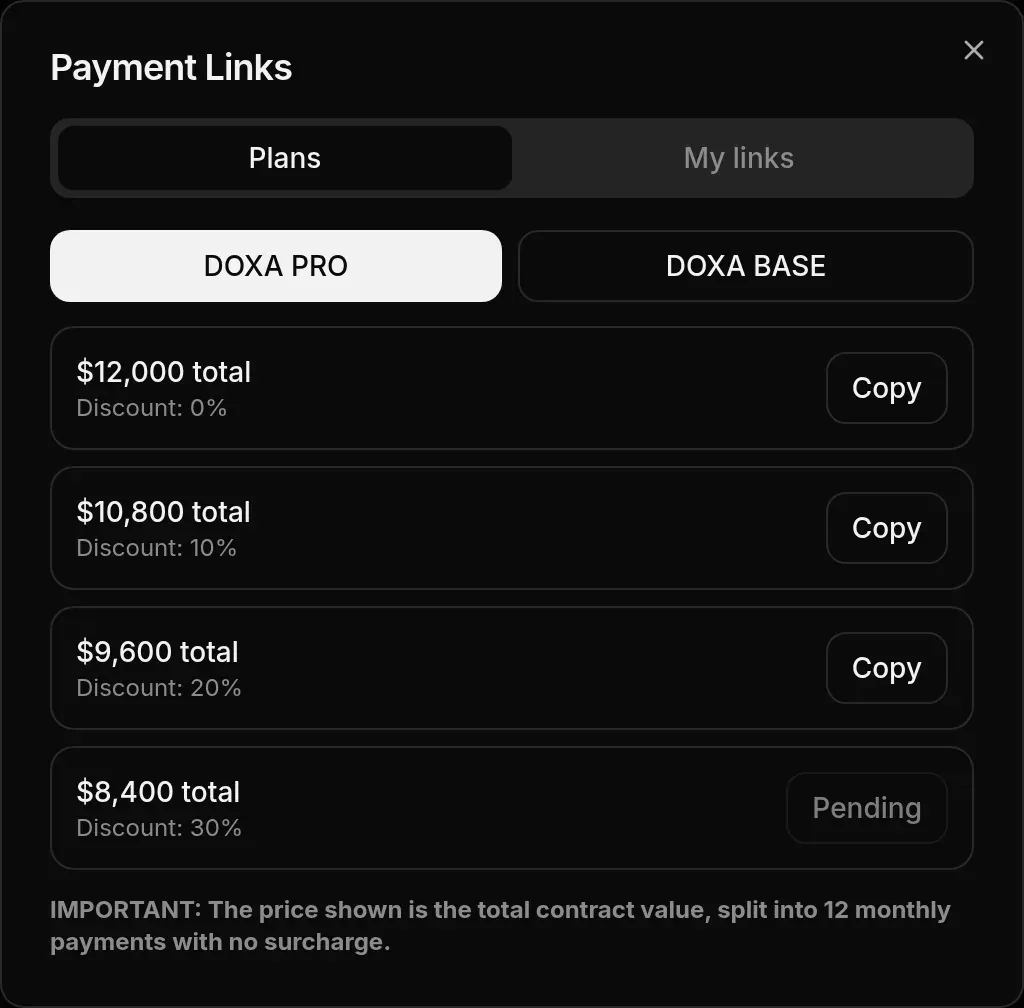
The Plans tab has the ready-made links for the DOXA PRO and DOXA BASE plans, at each discount level. Click Copy and send the link to the client. When a link is not available yet, the button shows Pending.
My links
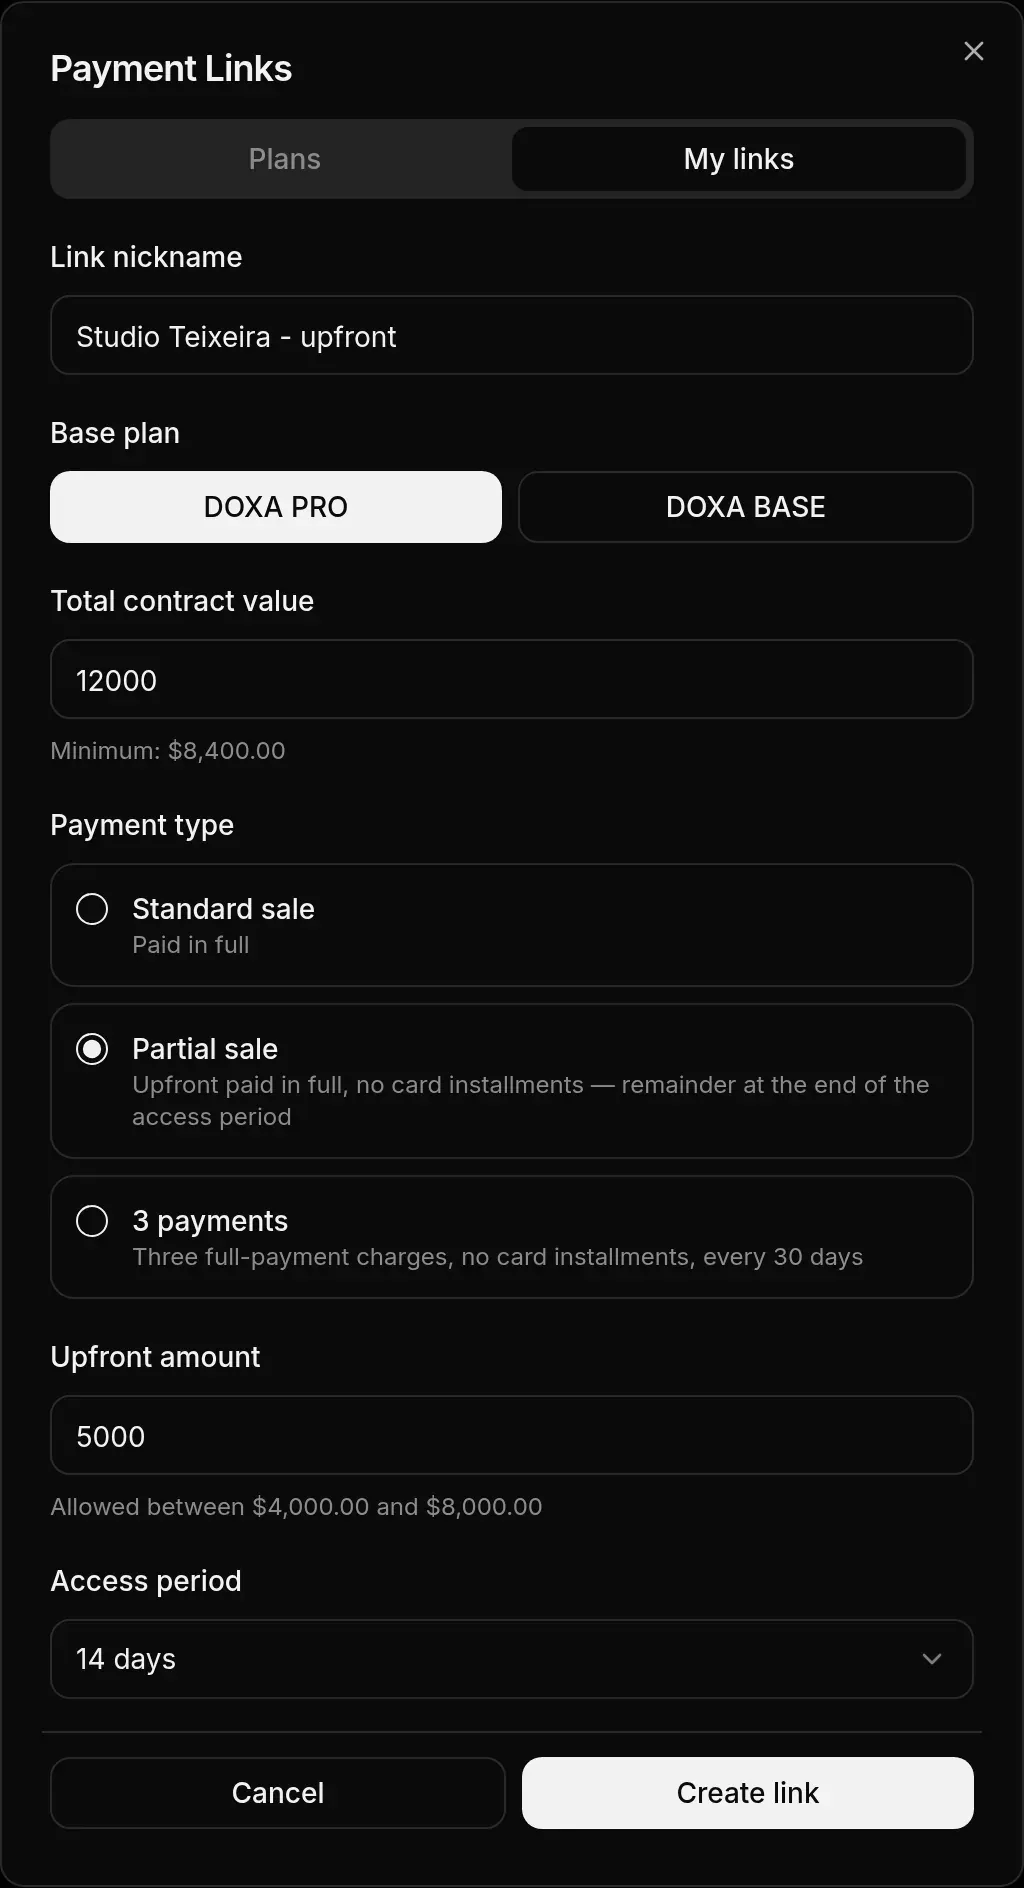
Section titled “My links”On the My links tab you create links with the amount you agreed with the client.
-
Click Create link.
-
Give it a Link nickname so you can recognize it later. A good habit is to use the client’s name and the terms, such as “Prado Clinic - upfront + balance”.
-
Choose the Base plan and enter the Total contract value. The value cannot be below the minimum shown on screen.
-
Under Payment type, choose one of the options:
- Standard sale: paid in full.
- Partial sale: an upfront amount paid in full, and the remainder at the end of the Access period you choose (7, 14 or 21 days). The upfront amount must be between 1/3 and 2/3 of the total.
- 3 payments: the total split into three full-payment charges, every 30 days.
-
Click Create link and copy the link to send it to the client.
How the link shows up in the list
Section titled “How the link shows up in the list”Once created, the link goes to the top of the My links list. Each row shows the nickname, the plan (DOXA-PRO or DOXA-BASE) and the payment terms spelled out, the way the client will pay. Use Copy to grab the link again at any time.
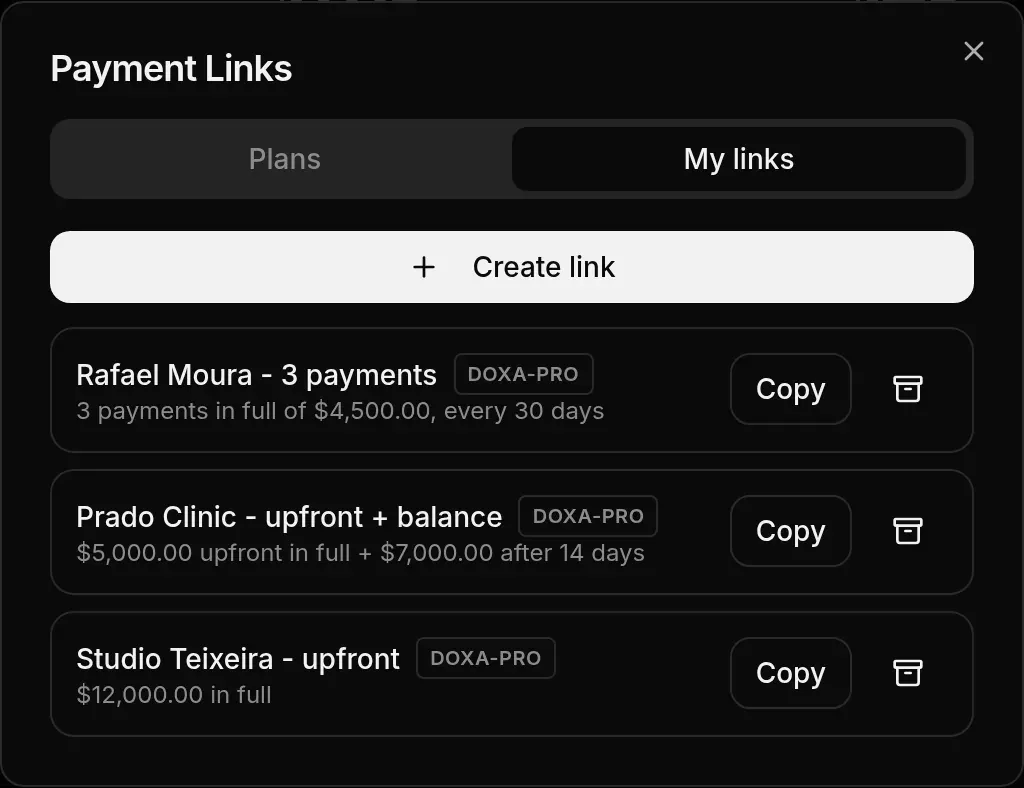
Links you no longer use can be archived with the archive icon. They are kept under Archived and come back with Unarchive.
Use cases
Section titled “Use cases”- Sale split across two cards: create a Partial sale with the upfront amount set to what fits on the first card. The client pays the upfront amount with the first card and, at the end of the access period, pays the remainder with the second one.
- Client who prefers to pay month by month: use 3 payments. The first charge is paid through the link, and the other two are charged on the platform every 30 days.
What the client sees when a payment is due
Section titled “What the client sees when a payment is due”In a Partial sale, after paying the upfront amount the client gets the invite and creates the account. When the access period ends, the platform asks for the remainder before the client can keep using it: the Your plan balance is due screen shows the amount to pay now and the Pay now button. As soon as the payment is identified, access is restored automatically.
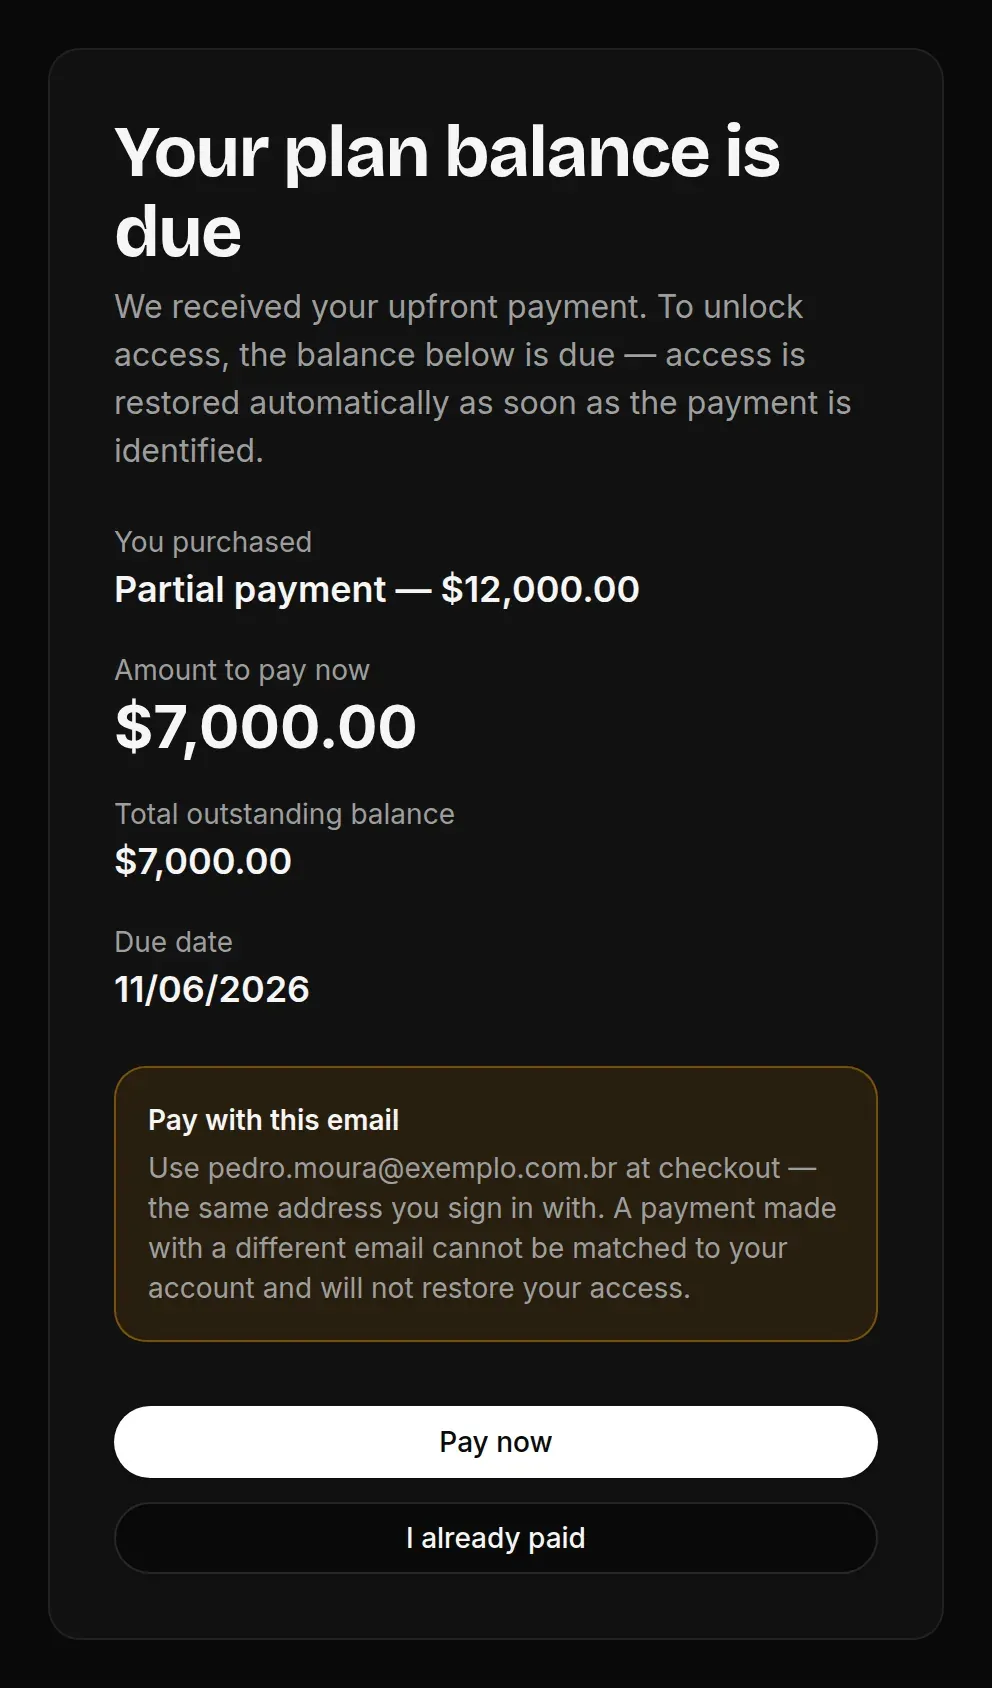
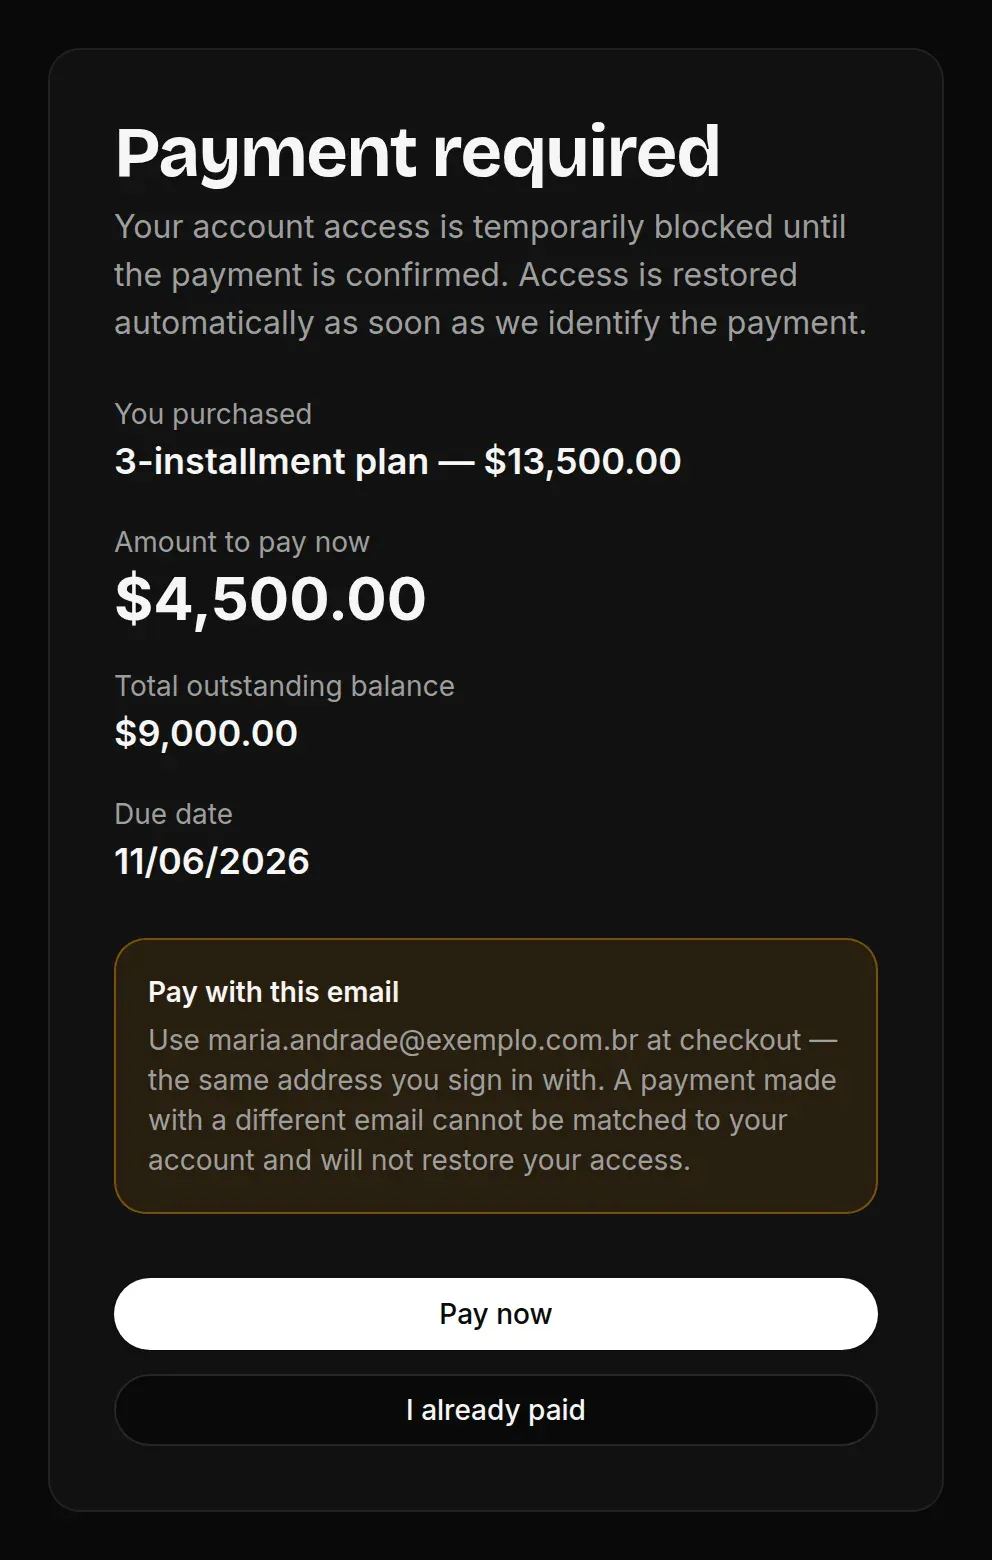
With 3 payments, the block works the same way at each charge. When the 2nd or the 3rd charge is due, the client’s access is blocked on the Payment required screen until the payment is identified. The screen shows the charge amount, the total outstanding balance and the due date.